 Member Edit
- Step-By-Step
- Tips and Tricks
- Related Tools
1 . Invoke Member Edit using the Find Tool by searching the command name and clicking the icon, which is pictured above.
Learn more about alternative methods for launching commands.
2 . The status line prompts you to "Select member". Select the one or more members that are the same member type, then press the Enter key or right-click and choose OK on the context menu.
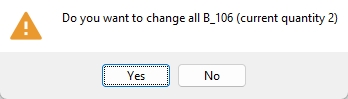
3 . The edit window opens for the particular member type you selected. If you selected multiple members, the window is titled "... Multiple Members" (e.g., Beam Edit -- Multiple Members). If you selected multiple types of members, Member Edit by Piecemark opens the Edit Properties window. When you are done making changes to the settings in the member's edit window, click the OK button to accept the changes. If more than one member has the same piecemark as the member you selected, a window appears asking if you want to change all members with that piecemark. Select Yes or No to complete the Member Edit command.
Alternative: Click the Cancel button to not apply any changes made to the settings in the member edit window and end the command.
- You can preselect or in-tool select the members.
- When you edit one member, you are given the option to change all members that share the same piecemark or change only the member you selected. When you edit multiple members , change all is not an option.
- If a Multiple Edit Password has been set up, you cannot multi-edit until you have entered that exact, case-sensitive password.
- If members selected are not the same type, the Edit Properties window opens.
- Be aware of the meaning of mixed entries. They indicate that different settings have been applied to the members being edited. You may find mixed entries even when the members you are editing all have the same piecemark. You can edit such fields.
- If you are editing a single member, the
 Summary leaf on a member edit window gives you a list of the member numbers of all members with the same piecemark as the member whose edit window you are on.
- Other ways to edit a member: double-click or right-click > Edit Other.
- Member Edit by Piecemark (alternative to Member Edit)
- Member Edit by Number (alternative to Member Edit)
- "Edit Other" on context menu (alternative to Member Edit)
- Double-click main material (alternative to Member Edit)
- Selection filter (useful tool that aids selection)
- Grayed out fields (indicate mixed entries or that the field is disabled)
- Multiple Object Edit Password (prevents unauthorized multi-editing in Modeling)

